December is over! It’s nearly time to get ready for a new year or gardening. We know that Spring is still a little ways away. But there’s a common cultivation trick we can use to get a head start: starting indoors.
The process is rather simple. By planting seeds indoors earlier than their recommended outdoor planting date, you can grow them into seedlings sooner, allowing them to eventually grow and reach harvest sooner.
The main idea behind the process is that by starting the seeds indoors, we can provide a more hospitable growing environment for the seeds. It will be warmer, and more illuminated than outside is. But the process only works if you provide the seeds with the proper care during this time. Here’s our advice for ensuring a healthy and early start indoors.
When to Start Seeds Indoors
The actual answer will vary from plant to plant, but a general rule can be applied. For most vegetables, you can start up to 8 weeks earlier than usual. For faster growing veggies, like turnips, we recommend a smaller early start, 4 or so weeks.
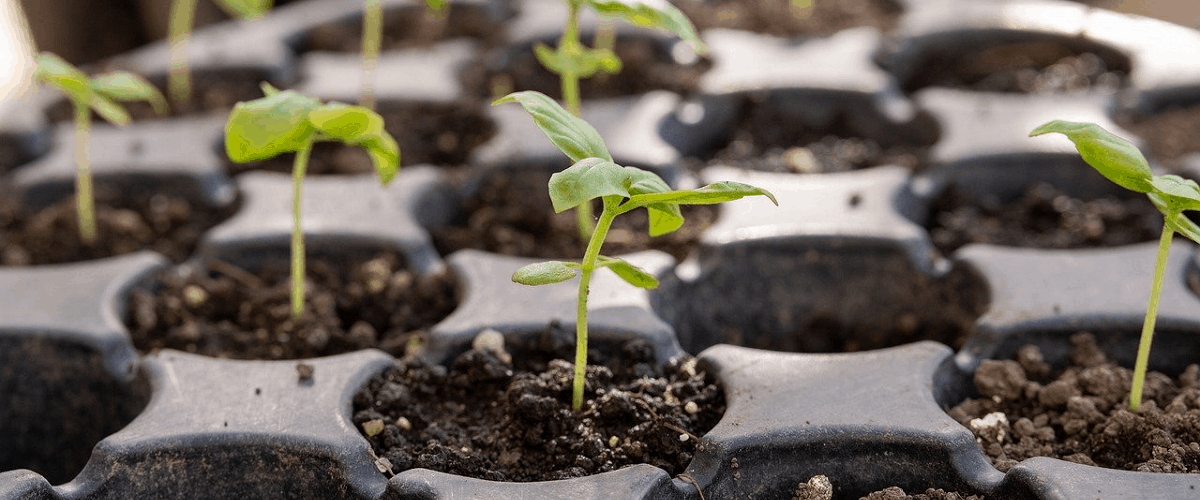
Use a Starting Tray
Starting trays are large, plastic trays, often made of many smaller pockets, similar to an ice cube tray. These are used specifically for starting seeds in a clean and organized manner. Fill each pocket with dirt, plant a single seed, and care for them as normal. These will help keep your seeds organized indoors. It will also make it particularly easier to transplant outside or into a larger container once they grow large enough. Simply pop out the entire pocket of dirt and transfer.
Use Starting Dirt
It’s no secret that crops need healthy soil to grow well. But many folks overlook the special soil made for starting seeds. Understandably called Seed Starting Soil Mix, it’s a mix made specifically for starting seeds. This soil is very nutrient rich and rather loose. This allows new plants to grow without much earthy resistance and to take full advantage of the nutrients it contains.
Use the Right Lights
When indoors, it’s important to have the right artificial lighting for plants. Insufficient light can cause weak plants and off-center growth patterns. The most common options are tube shop lights. These long, round lights allow for sizable coverage for a decent price. More hardcore gardeners will use lights designed specifically for plant growth. These are often purple in color, broadcasting the specific spectrum of lights needed for plants. Regardless of which you choose, we suggest going for the LED options. They cost a bit more, but last a lot longer and use less energy.
Now that you have everything you need. Here’s what you need to do with it.
Place the Soil First
You should fill the planting trays with soil a few days before you intend to plant the seeds. This gives the soil time to settle into the new form, give you time to even out the surface levels, and time to moisten the soil properly before planting. You want the soil moist, but not saturated. Too wet and the seeds will rot. Too dry and they won’t germinate.
How to Plant Seeds in a Starting Tray
Now that the soil is ready, it’s time to plant the seeds. Most folks recommend planting at least 2 seeds per tray pod. Some only recommend doing that for half, or even a fourth of the cells. Regardless of what you pick, you should trim away extras once the seeds sprout out of the surface so that they don’t compete for nutrients. You can pull the seedling out, but this risks upsetting the roots of the seedling you intend to keep.
You won’t need light until they break the surface. If you have full spectrum lights, it won’t hurt to have them on anyway. This will give you a clear view of any seeds that are growing.
If you want to maintain moisture as well as you can, you can invest in a starting dome. These are clear plastic covers or wraps that help seal in the moisture levels of the starting tray. This way, less moisture is lost from the soil.
How to Care for Seedlings Indoors
The seeds have germinated and are now sprouting out of the surface. What do you do now? In short: water them and provide light.
The lights, ideally, should be close to the plants to provide ideal coverage. If it’s tube lights, keep them about 2 inches away from the highest plant. If you can’t manage a modular height for the lights, then whatever provides the most light without touching the plants is best. The lights should be kept on for 10 to 12 hours each day. Getting an outlet timer will help automate this process.
Now for watering. When smallest, using a spray bottle to gently mist water onto the surface is best. The rough flow of a watering can might disturb the seedlings in a bad way. Keep the soil, like before, moist without over saturating it.
If you are concerned about it not being warm enough inside, you can purchase a heat mat for the tray.
Hardening Off: When and How to Transfer Outside
Let’s say it’s been seven weeks and it’s nearly time to bring them outside. Like most living things, you can’t just throw them into a new environment and expect them to do fine. You need to get the plants adjusted to the outside world before transplanting them. This process is called hardening off.
Begin the hardening off process once the outside temperature starts to warm up enough to sustain plants. Bring the seedlings outside for a little bit, letting them get used to the outside. Avoid strong winds, rain, or too much direct sunlight. Repeat this every so often, gradually increasing outside exposure until they can safely handle it nearly all the time.
Transplant Outside
Once fully accustomed to the outside, the only thing left is to actually transplant them into their new outdoor home. This can be planter boxes, larger containers, or even right in the earth. Whatever you have prepared for them, dig out a loose dirt hole the size of their tray pod. Once ready, gently remove the dirt pods from the growing tray. Carefully soften up the dirt along the outside of the dirt pod you removed and place them into the prepared hole. Gently pat down and stabilize. Repeat until all seedlings are planted.